Plan a Lesson Around One Clear Learning Goal
A focused lesson plan connects what students should learn with what they will do and how you will check their understanding. Use this sequence to keep the session coherent without crowding it.
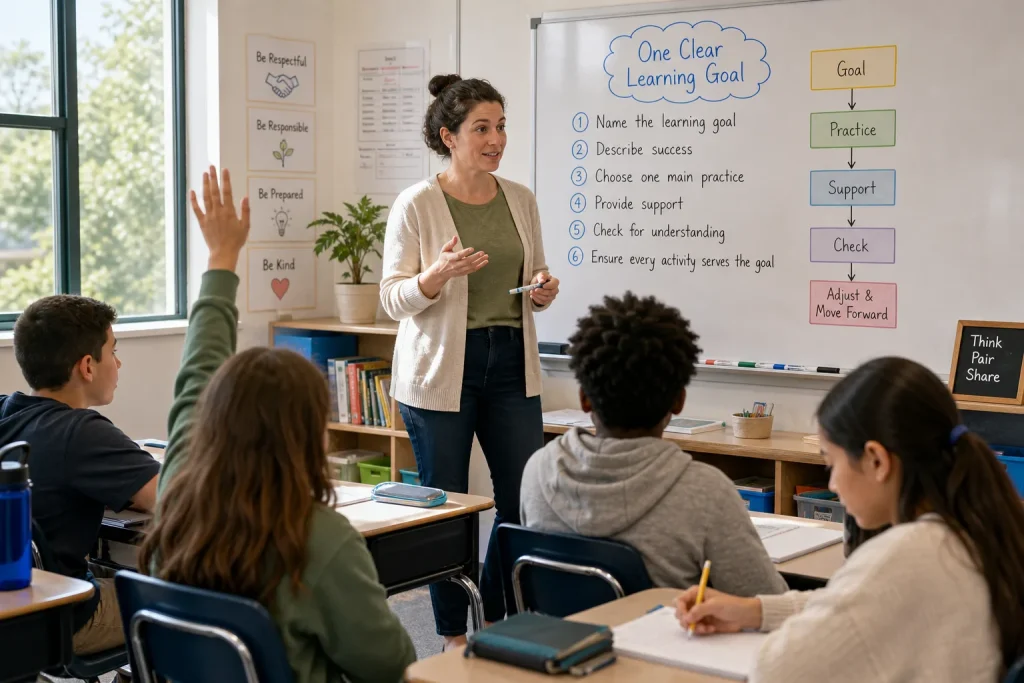
A focused lesson plan connects what students should learn with what they will do and how you will check their understanding. Use this sequence to keep…
Teaching · 8 min read
A class is halfway through a lesson on persuasive writing when students are asked to analyze a speech, sort examples of evidence, draft an opening, and exchange peer feedback. Each activity could be worthwhile, but together they leave little room to understand any one skill well. A clearer plan begins with one learning goal and lets that goal determine what belongs in the session—and what can wait.
The sequence below is designed to connect the aim, activities, and checks for understanding. It is not a script to follow rigidly. It is a way to make deliberate choices before the lesson begins, so that students have enough time to practice the intended learning and you have useful evidence of what they can do.
1. Name the learning students should leave with
Write the goal as a change in what students can understand or do, not as a list of classroom events. “Students will complete a worksheet about fractions” names an activity. “Students will explain why two fractions are equivalent using a visual model” names learning that can be observed.
A useful goal is narrow enough to guide one lesson, while still making room for meaningful thought. Verbs such as identify, compare, justify, and revise suggest different kinds of evidence. Choose the verb carefully: if students are expected to explain, a silent matching exercise alone will not show whether they can do it.
Consider what students already need to know. If a new goal depends on vocabulary or a procedure they have not encountered, either make that prerequisite a brief part of the lesson or adjust the goal. A plan becomes overloaded when it tries to teach foundational knowledge, a complex new skill, and an extended application all at once.
2. Describe what success will look like
Turn the goal into a few observable signs of understanding. These do not need to become a formal rubric. They should help you and your students recognize work that is on track.
For a goal about explaining equivalent fractions, signs might include choosing a visual model, showing that the same whole is being compared, and explaining how the parts relate. Keep the criteria aligned with the goal. If neatness or speed is not part of the intended learning, avoid making either a hidden condition for success.
Sharing the criteria before practice gives students a clearer target. You might display them beside an example, talk through one criterion aloud, or ask students to identify where it appears in a sample response. This makes success concrete without turning the lesson into a hunt for points.
3. Choose one main piece of practice
Once the goal is clear, select the activity that gives students the most direct chance to work toward it. The activity should require the thinking named in the goal, not merely mention the topic.
If the goal is to compare two historical sources, students need to examine both sources and make a comparison. A short teacher explanation can supply context, but copying dates from a display is not the central practice. If the goal is to revise a sentence for clarity, students need to make and explain a revision rather than only label sentence parts.
Limit the number of distinct tasks. A quick model, guided practice, and one focused independent attempt may be more useful than a string of activities that each introduce new instructions. When choosing an activity, ask: What will students actually do with the idea? What will I see or hear that connects their work to the goal?
4. Put support where students are likely to need it
Plan the explanation, example, or scaffold that helps students begin without doing the thinking for them. This might be a worked example on the board, a set of sentence starters, a labeled diagram, a word bank, or a short demonstration with physical materials.
Support should address a predictable barrier to the goal. For example, students comparing sources may need a prompt that separates what each source says from what the student infers. They may not need a long lecture on every event surrounding the sources. A scaffold is useful when it brings attention to the relevant thinking; it becomes a distraction when students must spend more effort managing it than using it.
Plan how support can fade. You could complete the first part of an example together, then ask students to try the next part with a partner, and finally invite an individual response. The sequence keeps the intellectual work with students while giving them a reasonable entry point.
5. Place a check for understanding before the end
Do not wait until the final minute to discover whether students are lost. Add a small check during the lesson, at a point when their responses can still shape what happens next. A useful check asks for evidence of the target thinking, not simply whether students feel ready.
Depending on the lesson, students might hold up a response card, annotate one example, explain a choice to a partner, or write a short answer on an exit slip. Choose a format that lets you notice individual understanding. A lively discussion can be informative, but a few confident voices do not necessarily tell you what everyone else understands.
Decide in advance what different responses will mean for your next move. If many students confuse the same idea, pause and model it another way. If most can explain the reasoning but struggle to apply it independently, provide another guided attempt. If responses vary, a brief partner explanation followed by a fresh question may help you see whether the difficulty was conceptual or simply a rushed answer.
6. Check that every activity serves the goal
Read the plan from beginning to end and ask what each part contributes. An opening prompt can surface prior knowledge. A model can make the process visible. Practice can build fluency or deepen reasoning. A check can reveal what students understood. If an activity has no clear connection, cut it, shorten it, or save it for another session.
This does not mean every minute must look like direct instruction. A relevant story, movement break, or playful challenge can support attention and memory. The question is whether it earns its place in this particular lesson. If it takes substantial time but neither supports the learning nor helps students engage with it, it may be competing with the goal.
Also allow for transitions and student questions. A plan that fills the whole period with new content leaves no room to respond to what students show you. Keep a small amount of flexibility for reteaching, discussion, or a useful pause.
7. End with evidence you can use next time
Use a final prompt that gives students one more chance to show the intended learning. It might be a short explanation, a worked problem, a marked-up text, or a revised draft. Keep the response small enough to complete and review without making the last part of class feel like an unrelated test.
After class, sort the evidence by what it suggests rather than simply counting finished tasks. Did students meet the goal, need support with one part, or misunderstand the central idea? A few brief notes can help you decide whether the next lesson should revisit a prerequisite, offer further practice, or move toward a more demanding application.
Student work can also reveal a mismatch in the plan. If students completed every activity but could not demonstrate the goal, the practice may not have asked them to use the required thinking, or the check may not have made that thinking visible. Treat that as information for revising the lesson, not as a reason to add more activities automatically.
Hypothetical worked example: explaining equivalent fractions
Imagine a class beginning a lesson with prior experience shading simple fraction diagrams but little practice explaining why two fractions can name the same amount. The lesson has a whiteboard, fraction strips, and room for a short written response. The goal is: “Students will explain, using a visual model, why two fractions can represent the same amount.”
The teacher names three signs of success: the student uses a model, compares fractions that refer to the same whole, and explains the relationship between the parts. The teacher briefly models how two fraction strips line up, then pairs students to choose strips and explain one equivalent pair to each other. Students next draw their own model and write a sentence explaining it.
Before independent work ends, each student responds to a new pair of fractions on a small board. If a student draws unequal wholes, the teacher can address the meaning of the model before asking for more written explanations. If the drawings are sound but the sentences are vague, the next prompt can focus on naming how the parts compare. The tradeoff is that the class explores fewer fraction pairs in this session; in return, the lesson keeps its attention on explaining equivalence rather than rushing through a larger set.
Keep the plan narrow enough to teach responsively
A clear goal does not make a lesson rigid. It gives you a reason to adjust: you can slow down when evidence points to confusion, or move on when students are ready. When the aim, practice, and check all ask for the same kind of thinking, each part of the session becomes easier to judge. The useful question is not how much content the plan contains, but whether students get a real opportunity to learn the thing you set out to teach.